建立 CI 流程除了需要建立 Runner 以外,另一部分就是需要設定好 CI 腳本,下面我們就根據 iOS 的專案來建立一個 CI 腳本,未來也可依照不同需求不同平台的專案,建立出專屬自己的腳本!
基本設定
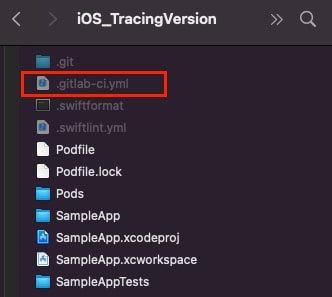
請先在 Repo 的根目錄下建立一個檔案,檔名為 .gitlab-ci.yml,並且打開後編輯它
首先要先設定有哪些 stages 狀態,這些狀態會對應在 pipeline 上的每個步驟,如下圖

這裡列出範例的狀態,請依照需求自行調整。
- start: 開始 CI 流程,可以執行通知 Slack 等等的腳本
- lint: 跑靜態檢查器,可以跑 swiftlint 或 swiftformat
- build: 編譯程式碼
- unittest: 跑單元測試
- archive: 可以在打 tag 時進行發版到 testflight ( 此處先略過,如果需要發版可呼叫 fastlane 的指令 )
- tracing: 追蹤某些程式碼狀況或版號
- end: 結束 CI 流程
1
2
3
4
5
6
7
8
| stages:
- start
- lint
- build
- unittest
- tracing
- end
|
推薦定義 before_script
每一個 stage 都會先跑這段,可以顯示 MR 資訊、Runner 資訊、現在路徑等等,方便找出問題,此處的語法就會是 Shell Script,就是終端機常用的指令方式,可以上網找找使用方式。
1
2
3
4
5
6
7
8
9
| before_script:
- echo MR Commit Ref Name, $CI_COMMIT_REF_SLUG
- echo user email, $GITLAB_USER_EMAIL
- echo Builder DIR, $CI_BUILDS_DIR
- echo Project Name, $CI_PROJECT_NAME
- echo Project Url, $CI_PROJECT_URL
- echo Runner ID, $CI_RUNNER_ID
- echo Runner Description, $CI_RUNNER_DESCRIPTION
- pwd
|
接下來就是一個一個 stage 來定義該做些什麼事
先定義一個狀態名叫 start_stage,他對應的狀態是 start,他該做的事會寫在 script,然而通常通知 Slack 的腳本是可以共用的,所以可以呼叫某個位置的腳本來執行,並且在後面帶入想要傳達的訊息。
1
2
3
4
| start_stage:
stage: start
script:
- sh ~/NoticeSlackScript.sh $CI_PROJECT_NAME $CI_PROJECT_URL $CI_RUNNER_ID $CI_RUNNER_DESCRIPTION $CI_COMMIT_REF_SLUG $GITLAB_USER_EMAIL
|
額外設定
- 使用
only => 指定分支
- 如果只想要 master 上執行,可以用 only: master 來指定分支
- 或是想要有 tag 才執行,可以用 only: tag 來指定
- 使用
when => 指定特定狀態
- 基本上 lint、build、unittest 是依序執行的,但只要 lint 失敗,build、unittest 會跳過 skip,可以用 when: always 無論如何都會執行!
- CI 的最後結果是成功或是失敗,可以用 when: on_success 和 when: on_failure 來定義!

1
2
3
4
5
6
7
8
9
10
11
12
13
14
15
16
17
18
19
| tracing_stage:
stage: tracing
only:
- master
when: always
script:
- sh ~/TracingScript.sh
end_stage_success:
stage: end
when: on_success
script:
- sh ~/NoticeSlackSuccess.sh $CI_PROJECT_NAME $CI_PROJECT_URL $CI_RUNNER_ID $CI_RUNNER_DESCRIPTION $CI_COMMIT_REF_SLUG $GITLAB_USER_EMAIL
end_stage_failure:
stage: end
when: on_failure
script:
- sh ~/NoticeSlackFailure.sh $CI_PROJECT_NAME $CI_PROJECT_URL $CI_RUNNER_ID $CI_RUNNER_DESCRIPTION $CI_COMMIT_REF_SLUG $GITLAB_USER_EMAIL
|
完整範例
1
2
3
4
5
6
7
8
9
10
11
12
13
14
15
16
17
18
19
20
21
22
23
24
25
26
27
28
29
30
31
32
33
34
35
36
37
38
39
40
41
42
43
44
45
46
47
48
49
50
51
52
53
54
55
56
57
58
59
60
61
62
63
64
65
66
67
68
69
|
stages:
- start
- lint
- build
- unittest
- tracing
- end
before_script:
- echo MR Commit Ref Name, $CI_COMMIT_REF_SLUG
- echo user email, $GITLAB_USER_EMAIL
- echo Builder DIR, $CI_BUILDS_DIR
- echo Project Name, $CI_PROJECT_NAME
- echo Project Url, $CI_PROJECT_URL
- echo Runner ID, $CI_RUNNER_ID
- echo Runner Description, $CI_RUNNER_DESCRIPTION
- pwd
start_stage:
stage: start
script:
- sh ~/NoticeSlackScript.sh $CI_PROJECT_NAME $CI_PROJECT_URL $CI_RUNNER_ID $CI_RUNNER_DESCRIPTION $CI_COMMIT_REF_SLUG $GITLAB_USER_EMAIL
lint_stage_lint:
stage: lint
script:
- swiftlint lint --config .swiftlint.yml
lint_stage_format:
stage: lint
script:
- swiftformat --lint . --config .swiftformat
build_stage:
stage: build
script:
- xcodebuild -list -workspace SampleApp.xcworkspace
- xcodebuild clean -workspace SampleApp.xcworkspace -scheme SampleApp | xcpretty
- xcodebuild build -workspace SampleApp.xcworkspace -scheme SampleApp -destination 'platform=iOS Simulator,name=iPhone 8,OS=14.1' | xcpretty -s
unittest_stage:
stage: unittest
script:
- xcodebuild clean -workspace SampleApp.xcworkspace -scheme SampleApp | xcpretty
- xcodebuild test -workspace SampleApp.xcworkspace -scheme SampleApp -enableCodeCoverage YES -destination 'platform=iOS Simulator,name=iPhone 8,OS=14.1' | xcpretty -s
- slather coverage --scheme SampleApp --workspace SampleApp.xcworkspace SampleApp.xcodeproj
tracing_stage:
stage: tracing
only:
- master
when: always
script:
- sh ~/TracingScript.sh
end_stage_success:
stage: end
when: on_success
script:
- sh ~/NoticeSlackSuccess.sh $CI_PROJECT_NAME $CI_PROJECT_URL $CI_RUNNER_ID $CI_RUNNER_DESCRIPTION $CI_COMMIT_REF_SLUG $GITLAB_USER_EMAIL
end_stage_failure:
stage: end
when: on_failure
script:
- sh ~/NoticeSlackFailure.sh $CI_PROJECT_NAME $CI_PROJECT_URL $CI_RUNNER_ID $CI_RUNNER_DESCRIPTION $CI_COMMIT_REF_SLUG $GITLAB_USER_EMAIL
|
結語
.gitlab-ci.yml 的設定方式有千變萬化,同時請注意 gitlab 或 runner 的版本是否支援到你寫的腳本,更多東西可以去 gitlab_ci_yaml 官方網站去尋找。