模組跟專案程式碼沒有什麼差別,一樣會需要依賴某個三方、使用某個三方,
也可能需要使用到一些 Asset 資源圖片等等和 Storyboard、Xib,理論上都是可以做得到的。
針對原本 Podspec 的資料夾結構,有進行調整,所以可以先看 Podspec 調整資料夾結構
如果不調整也是沒問題,只要小心 podspec 內定義的路徑。
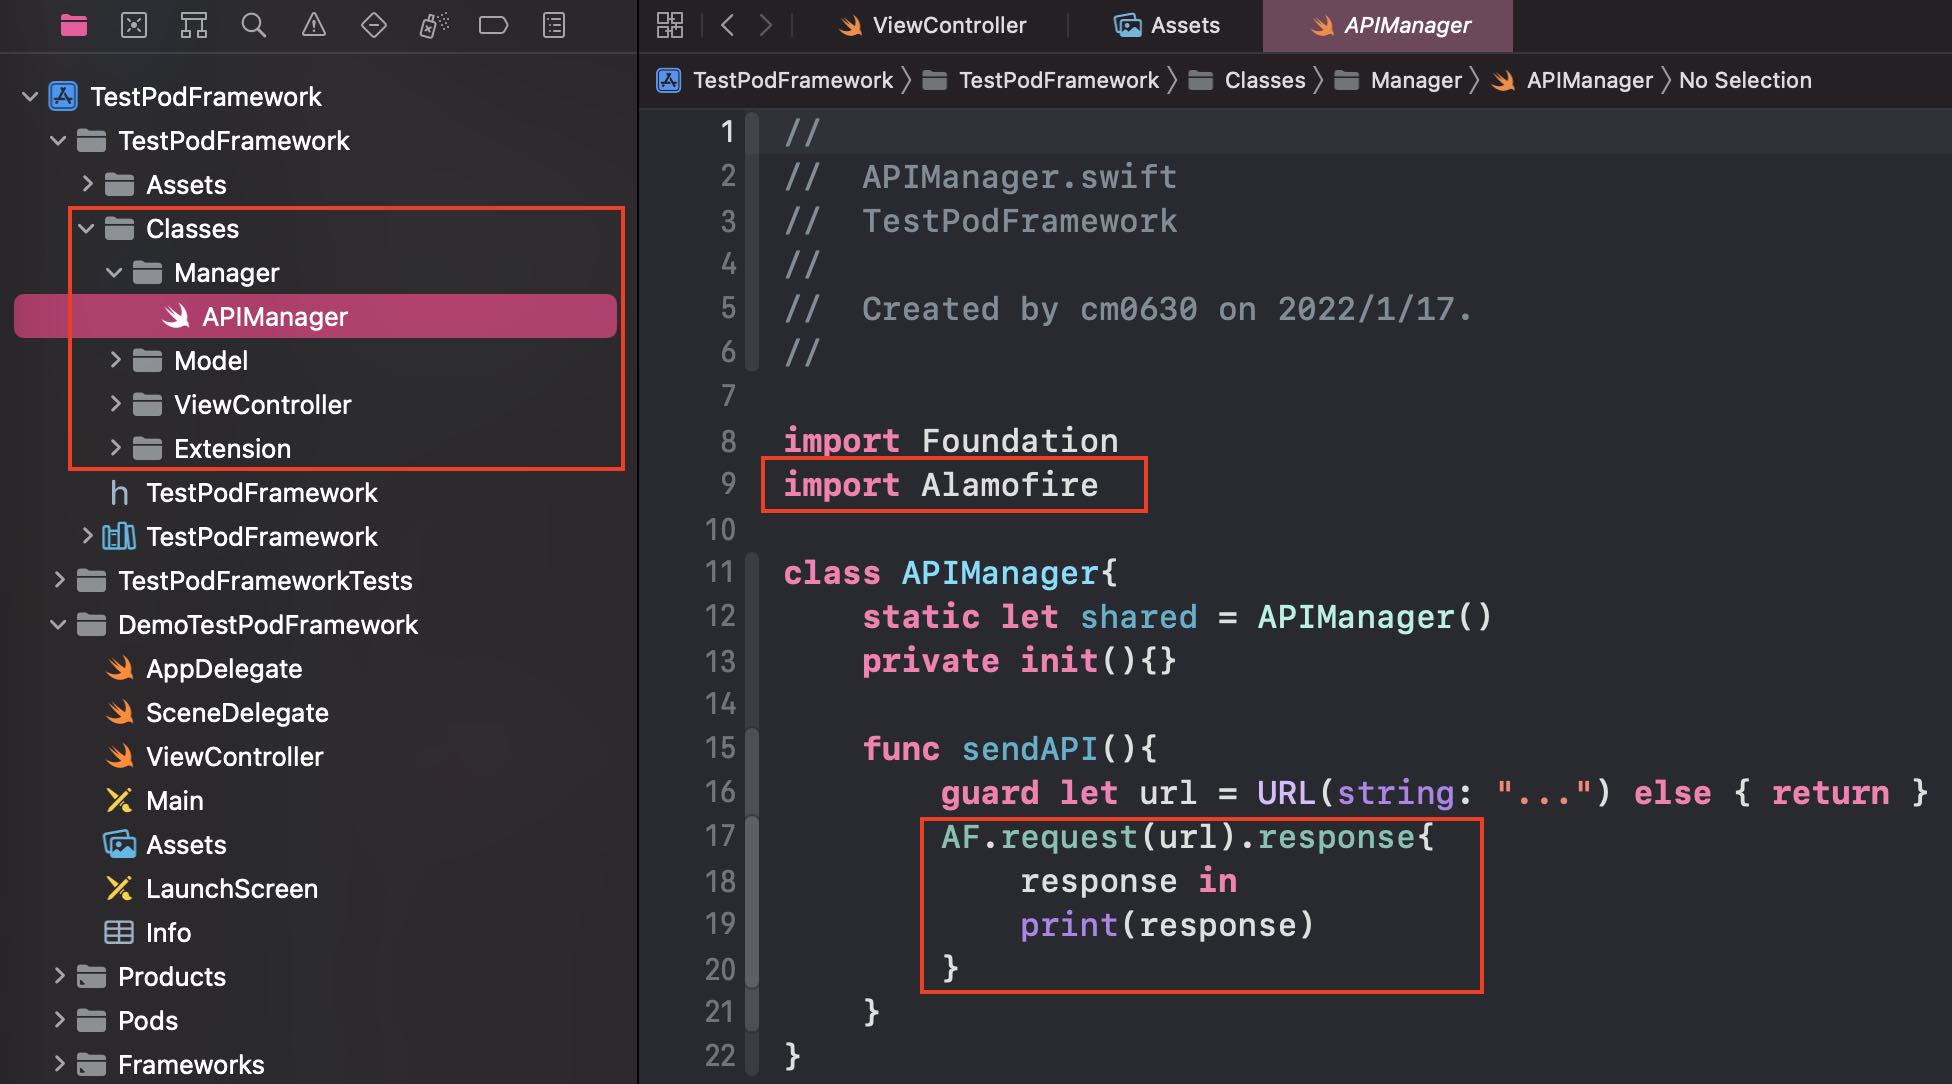
Podspec 內使用三方
- 編輯 TestPodFramework.podspec,新增依賴三方,例如 Alamofire
- 盡量固定版號或是使用 ~>,讓依賴的三方可以在固定版號之上,減少使用到錯誤版號的問題
1
| s.dependency 'Alamofire', '~> 5.4.4'
|
- 編輯 podfile,與第一步使用相同版號,重新 pod install
1
2
3
4
5
6
7
8
9
10
11
12
13
| target 'DemoTestPodFramework' do
use_frameworks!
pod 'TestPodFramework', :path => '../'
end
target 'TestPodFramework' do
use_frameworks!
pod 'Alamofire', '~> 5.4.4'
target 'TestPodFrameworkTests' do
end
end
|
- 這樣就可以在模組內使用任意三方啦!
Podspec 內使用 Asset 或是給外部使用
- 編輯 TestPodFramework.podspec,新增 s.resource_bundles
- 前面是指此 resource_bundle 的名稱,例如叫做 TestPodFramework
- 後面是指此 resource_bundle 所打包資源的位置
1
2
3
4
| s.resource_bundles = {
'TestPodFramework' => ['TestPodFramework/Assets/*.*',
'TestPodFramework/Classes/**/*.{xib,storyboard}']
}
|
這裡提醒一下,一般還有使用 s.resource、s.resources,但非常不建議這樣做,
因為這那種做法打包出來的 bundle 會跟專案的 main bundle 混在一起,
如果專案本身有相同名稱的圖片或是 storyboard,會優先使用專案的,會造成模組內的資源全失效QQ
- 打開 TestPodFramework.xcworkspace,對 Assets 新增 Assets Catalog
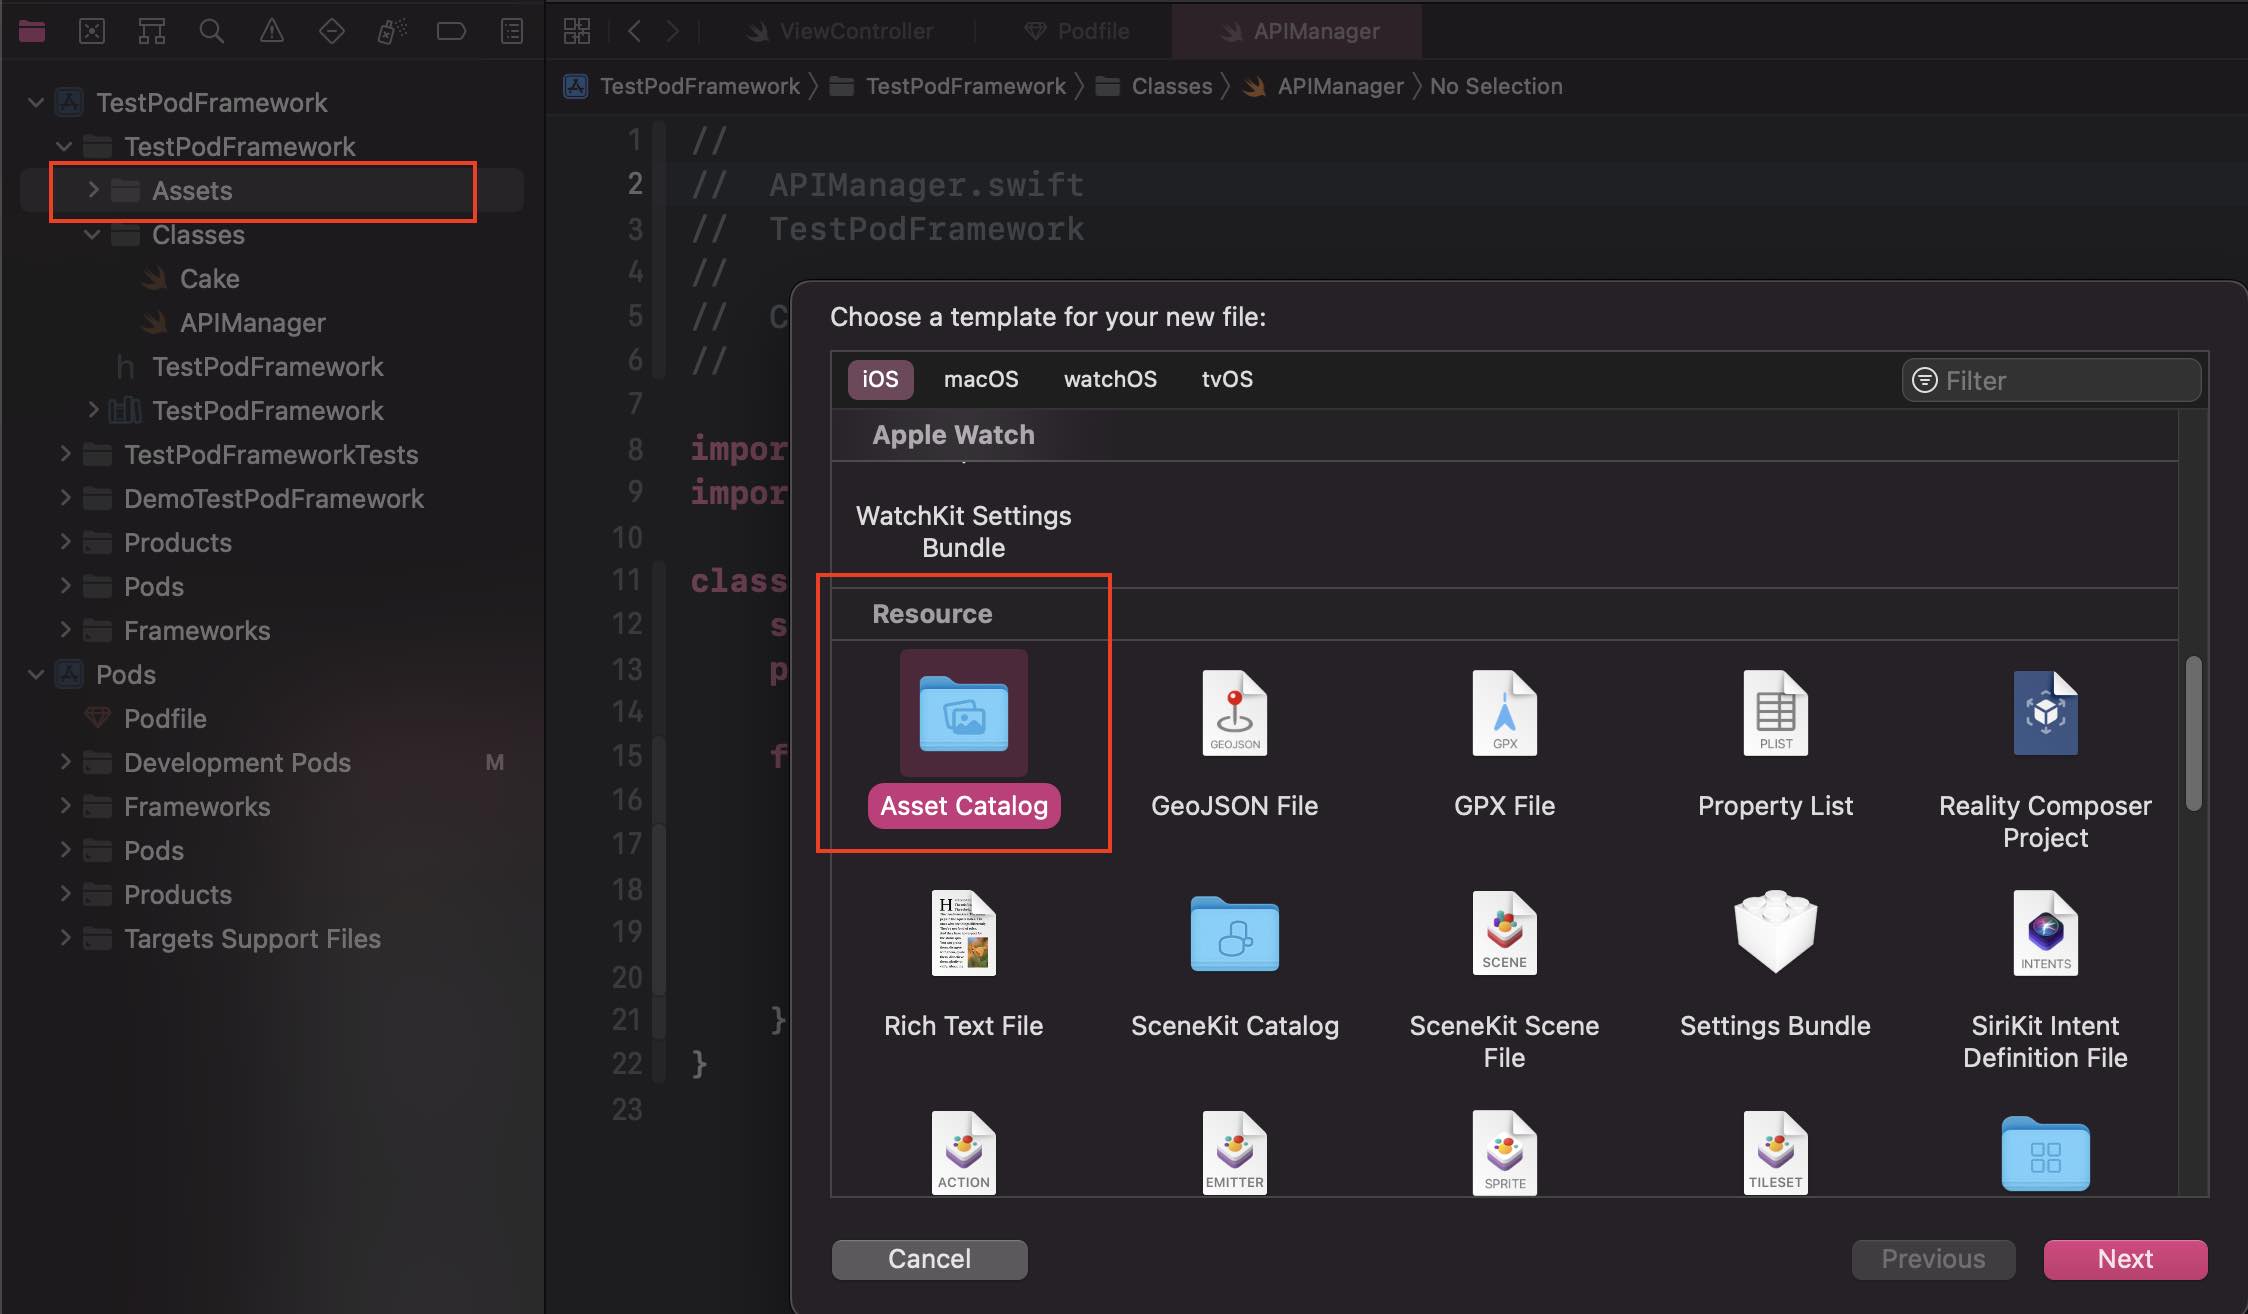
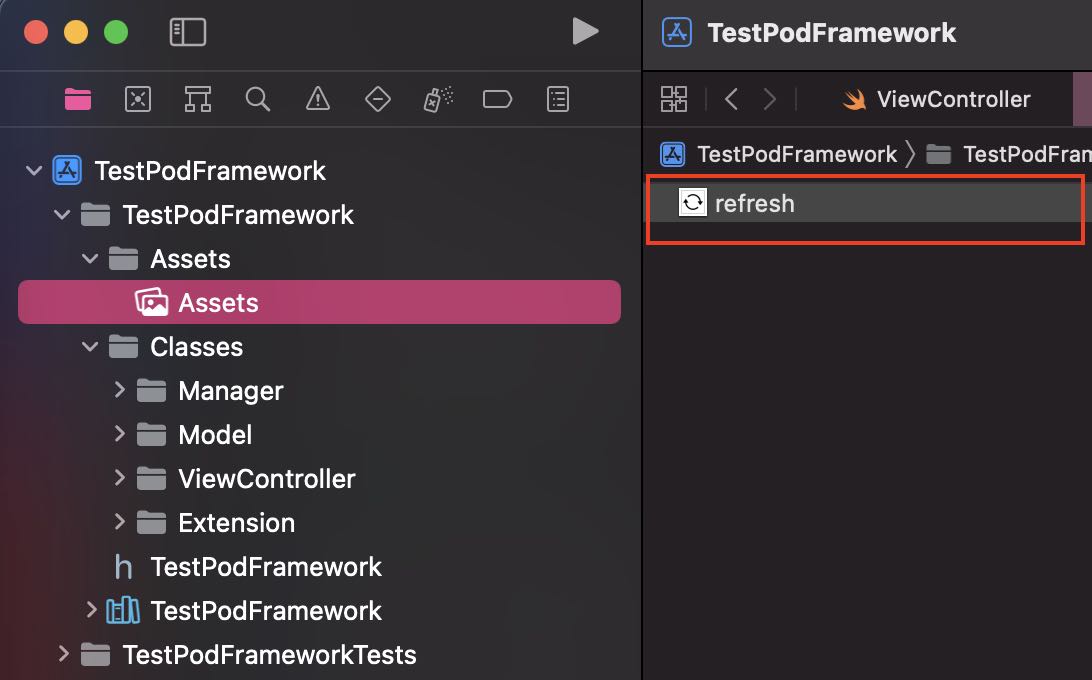
- 模組內在 Assets Catalog 內直接加入一張圖
- 模組內新增 Bundle 的 extension,讓此模組的 Bundle 在模組內或模組外都更容易找到
1
2
3
4
5
6
7
8
9
10
11
| extension Bundle{
public static var testPodFramework: Bundle?{
let kBundle = "bundle"
let kFramework = "TestPodFramework"
let bundleURL = Bundle.main.url(forResource: kFramework, withExtension: kBundle)
guard let bundleURL = bundleURL else { return nil }
return Bundle(url: bundleURL)
}
}
|
- 專案或模組只要載入圖片時指定 Bundle 即可
1
| imageView.image = UIImage(named: "refresh", in: Bundle.testPodFramework, compatibleWith: nil)
|
Podspec 內使用 Storyboard 給外部使用
- 請先做上面提到的 Podspec 內使用 Asset 的”第一步”
這裡會先遇到一個難處
要會將 ViewController 和 Storyboard 的進行連接
這樣初始化 VC 才會帶有完整的 Storyboard。
- 模組內新增 protocol,來處理 ViewController 和 Storyboard
有下面三個屬性來處理,都有預設的處理方式,如果有需要自行實作也可
- storyboardName
- storyboardBundle
- storyboardIdentifier
1
2
3
4
5
6
7
8
9
10
11
12
13
14
15
16
17
18
19
20
21
22
23
24
25
26
27
28
29
30
31
32
33
34
35
36
37
38
39
40
41
42
43
44
|
public protocol StoryboardInstantiable {
static var storyboardName: String { get }
static var storyboardBundle: Bundle? { get }
static var storyboardIdentifier: String? { get }
}
public extension StoryboardInstantiable {
static var storyboardName: String { return String(describing: self) }
static var storyboardBundle: Bundle? {
if let selfClass = self as? AnyClass{
let bundle = Bundle(for: selfClass)
return bundle
}else{
return nil
}
}
static var storyboardIdentifier: String? { return String(describing: self) }
static func instantiate() -> Self {
let storyboard = UIStoryboard(name: storyboardName, bundle: storyboardBundle)
if let storyboardIdentifier = storyboardIdentifier {
return storyboard.instantiateViewController(withIdentifier: storyboardIdentifier) as! Self
}
else {
return storyboard.instantiateInitialViewController() as! Self
}
}
}
|
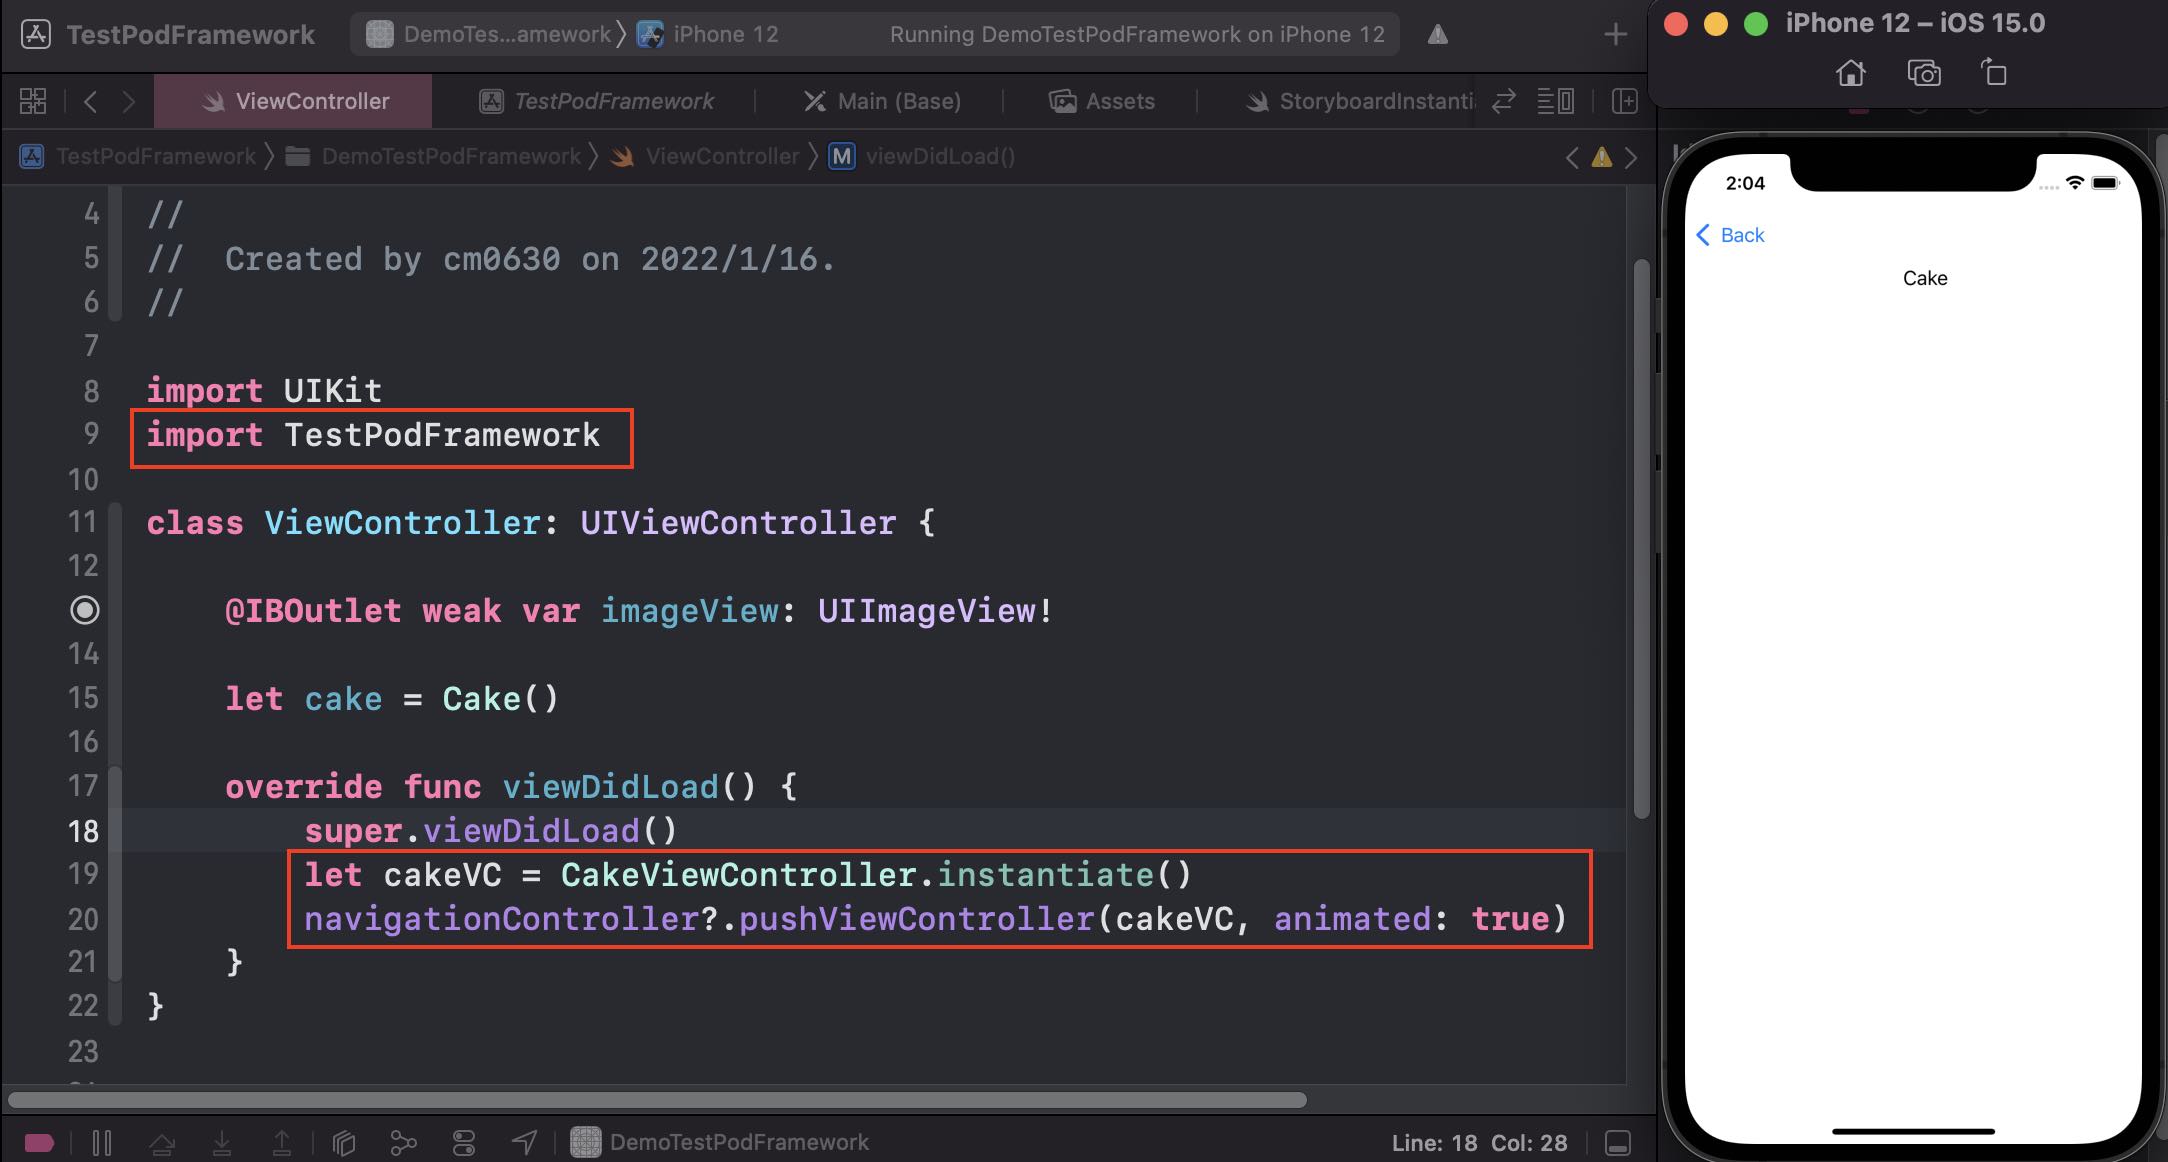
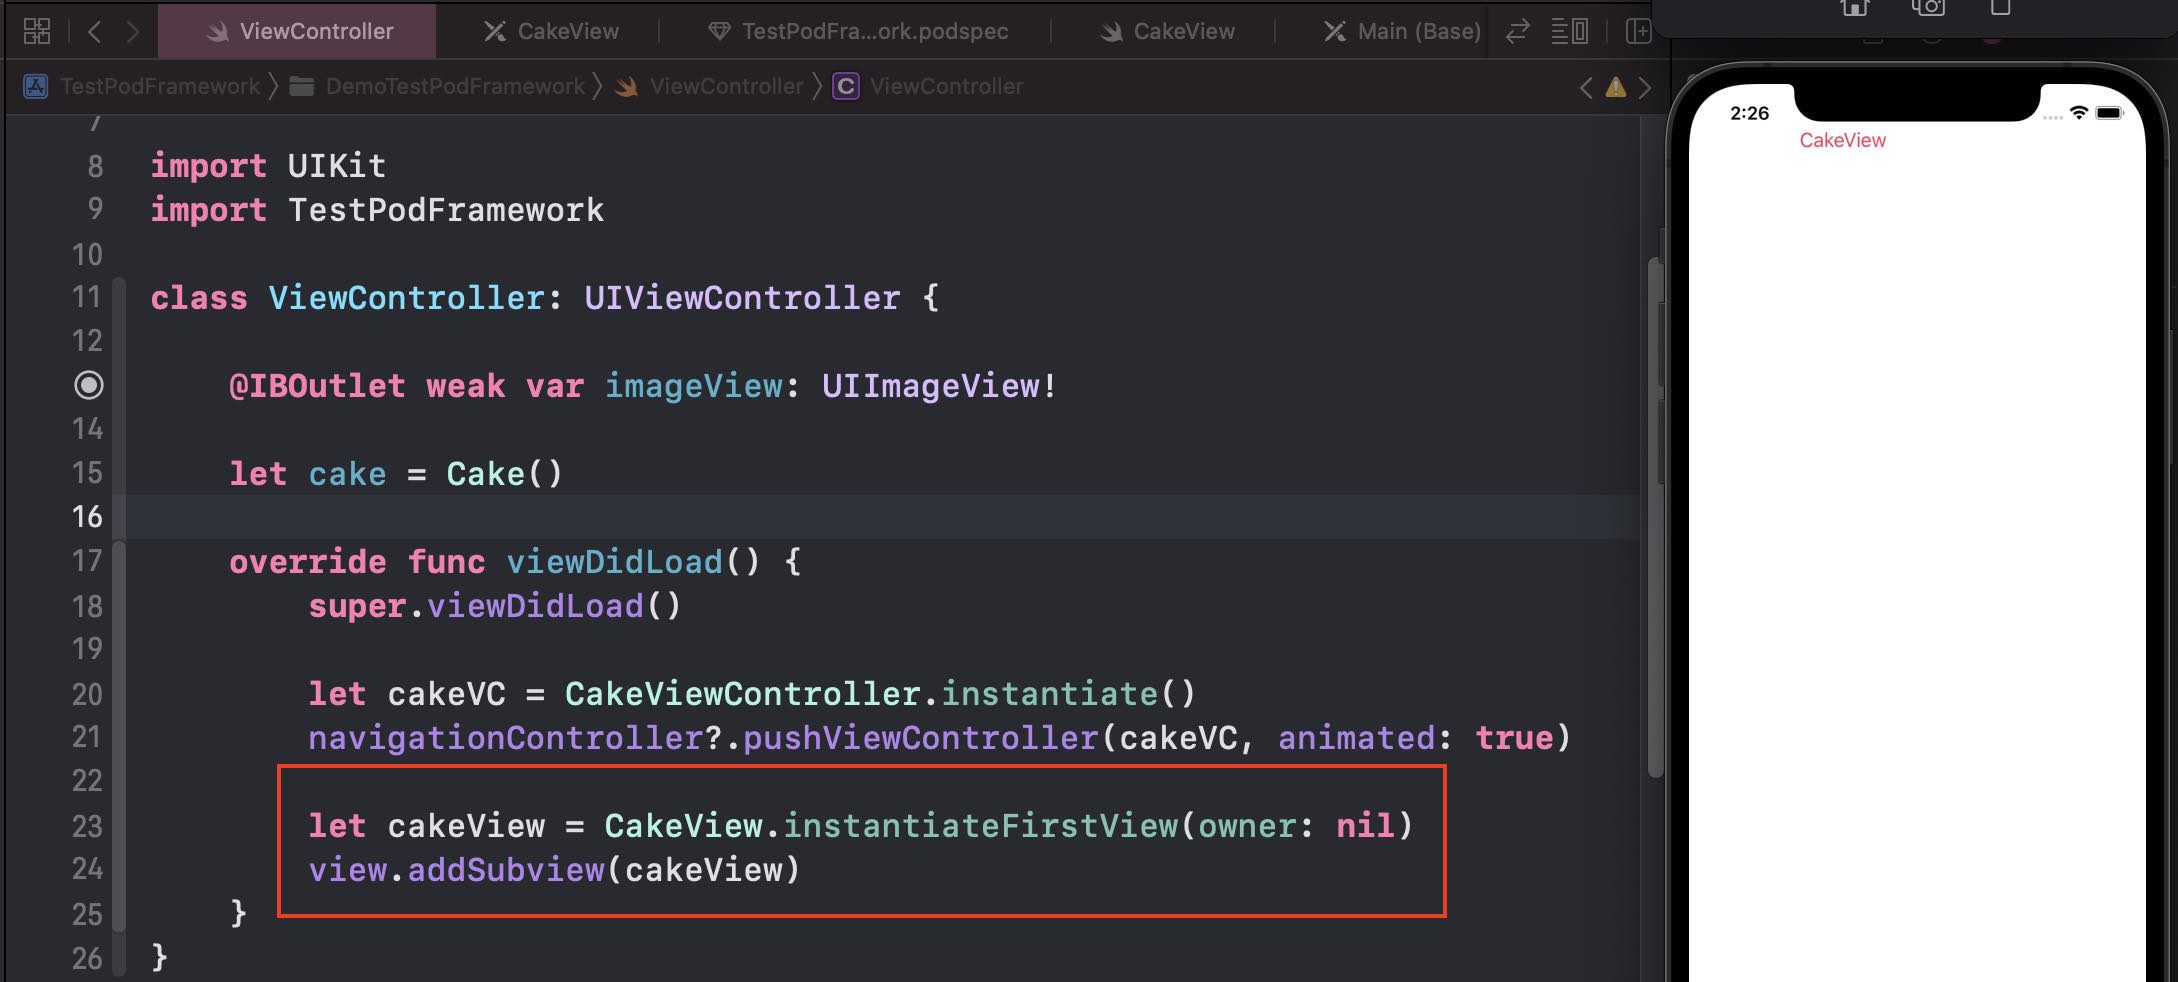
- CakeViewController 需要 confirm StoryboardInstantiable
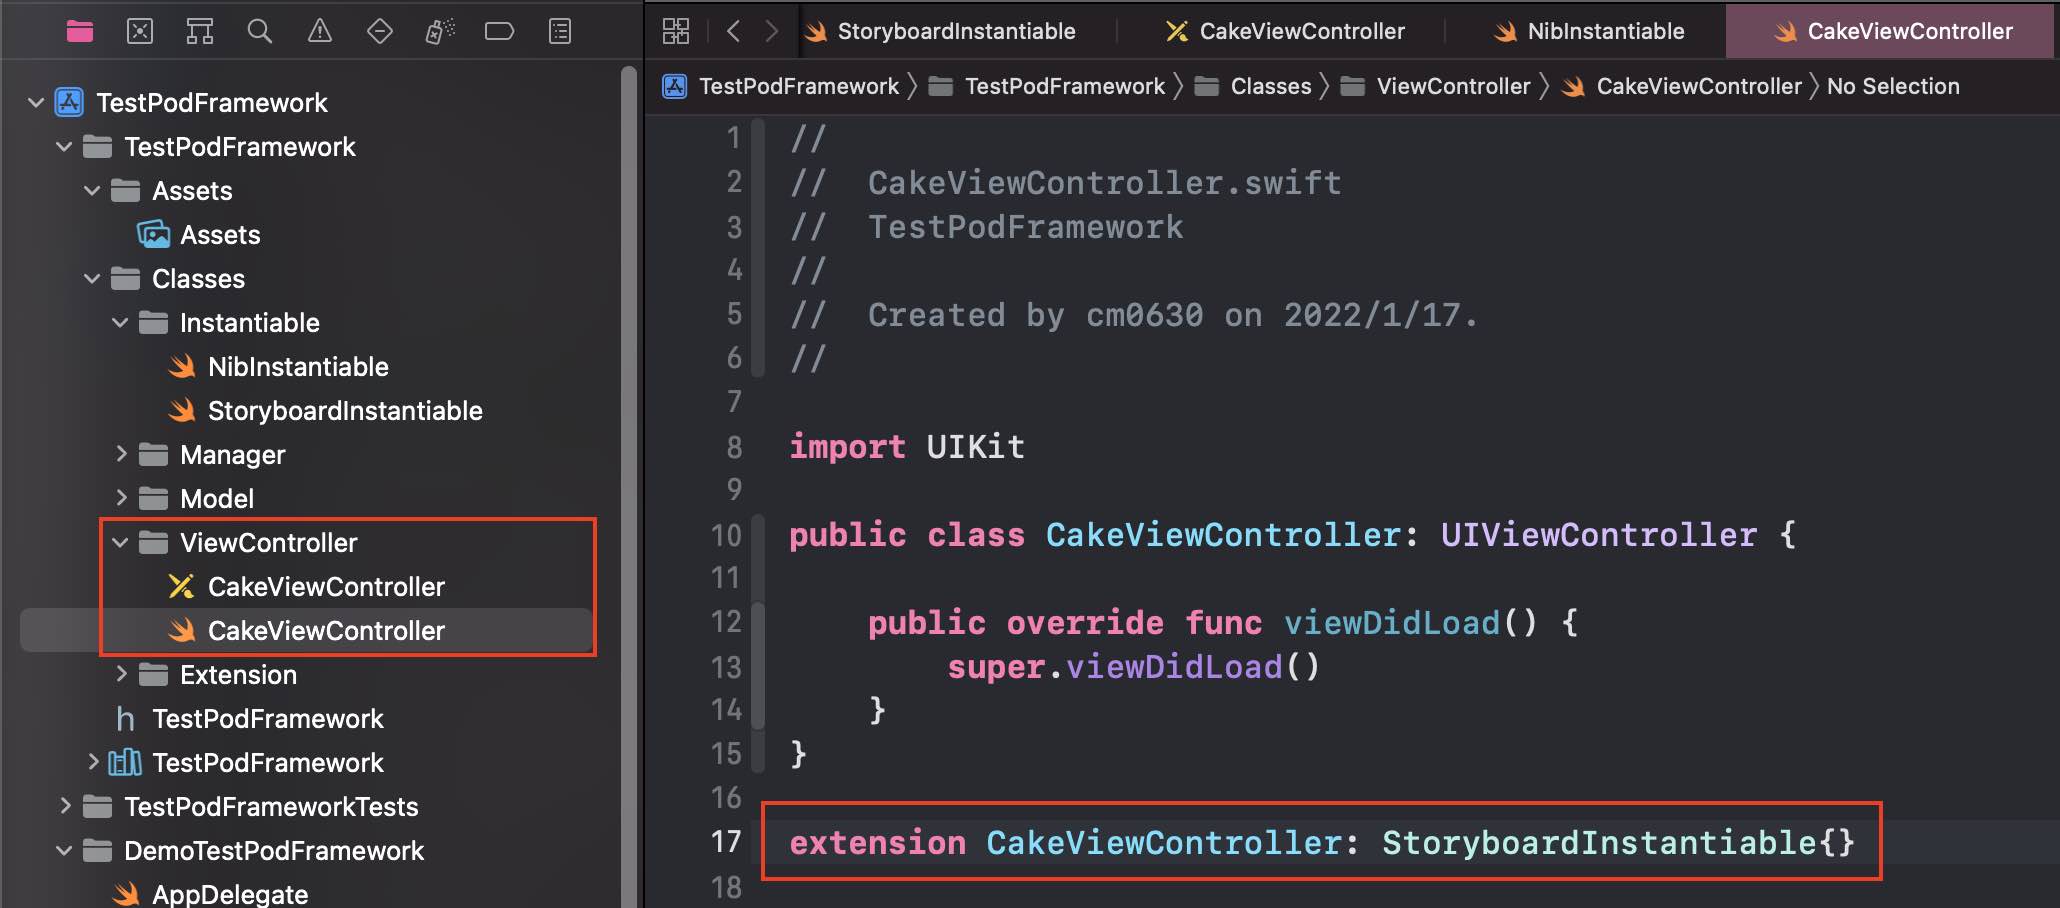
- Storyboard 設定 class 和 StoryboardID
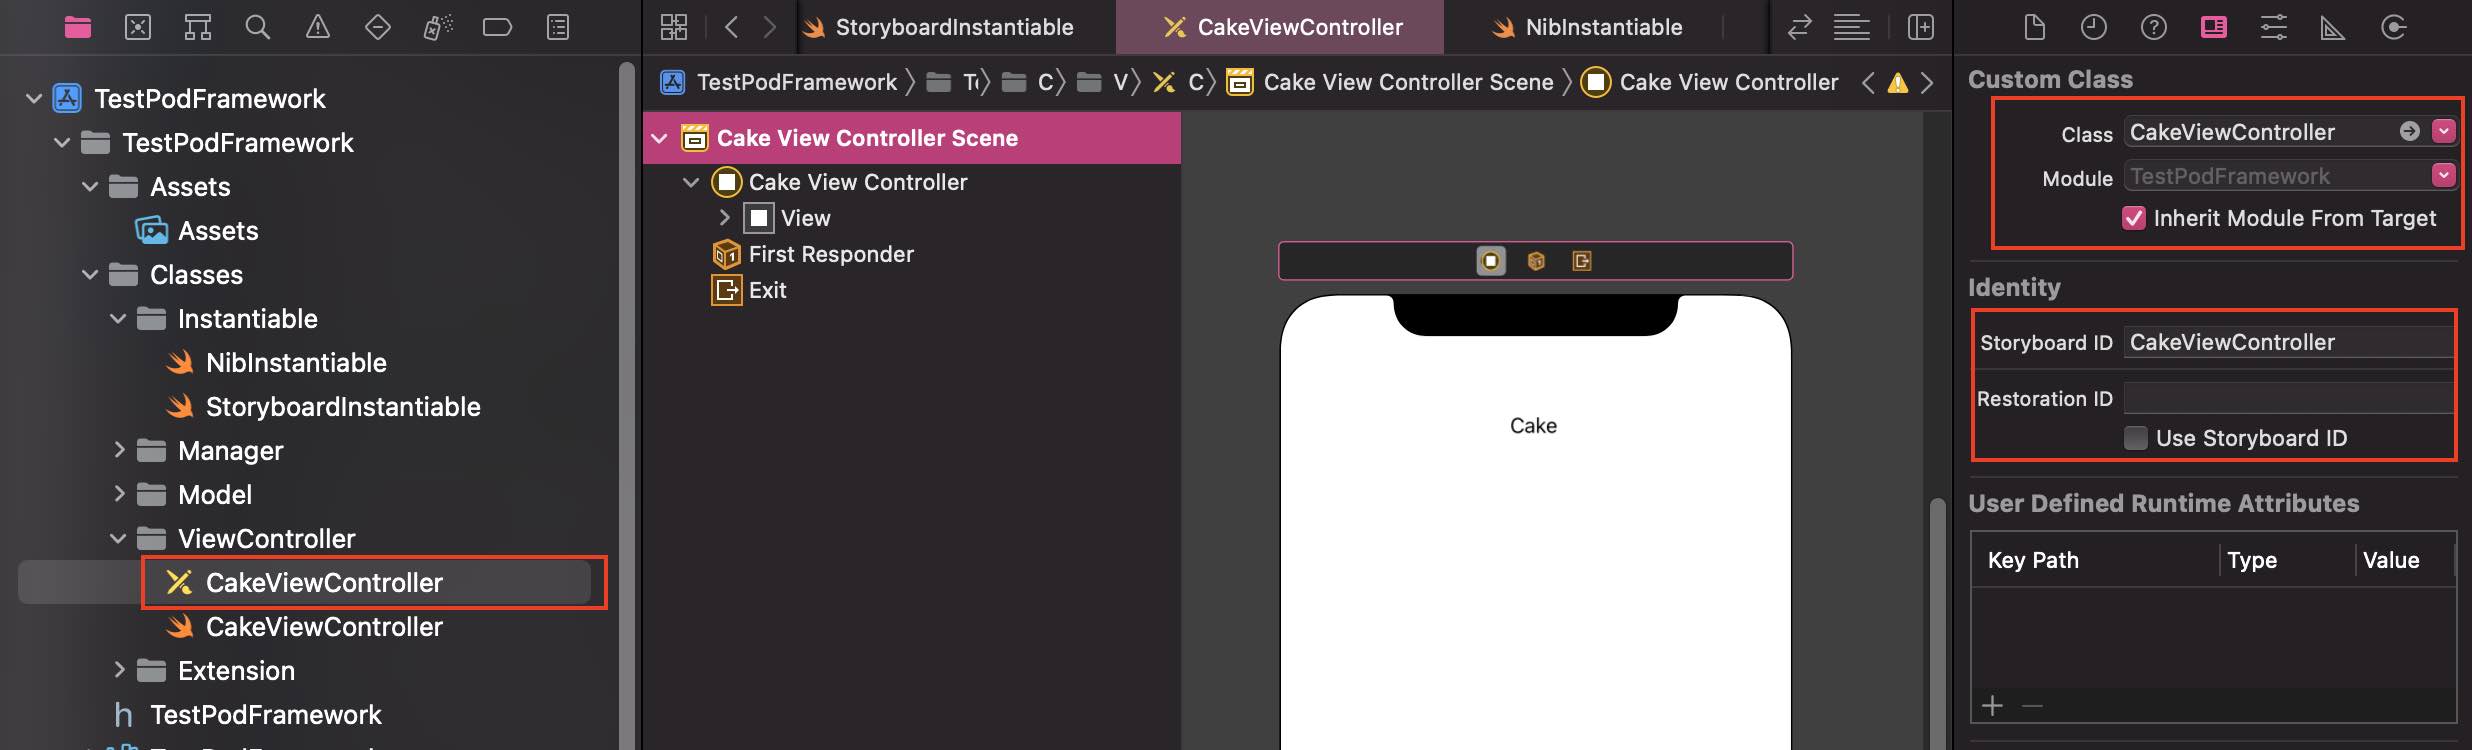
- 專案或模組只要使用 instantiate 方法就可以正常載入 Storyboard!
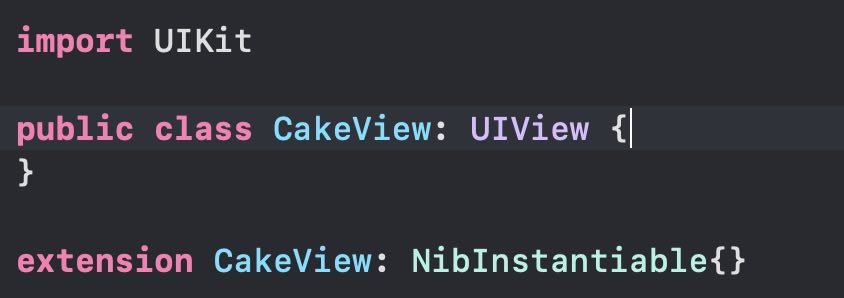
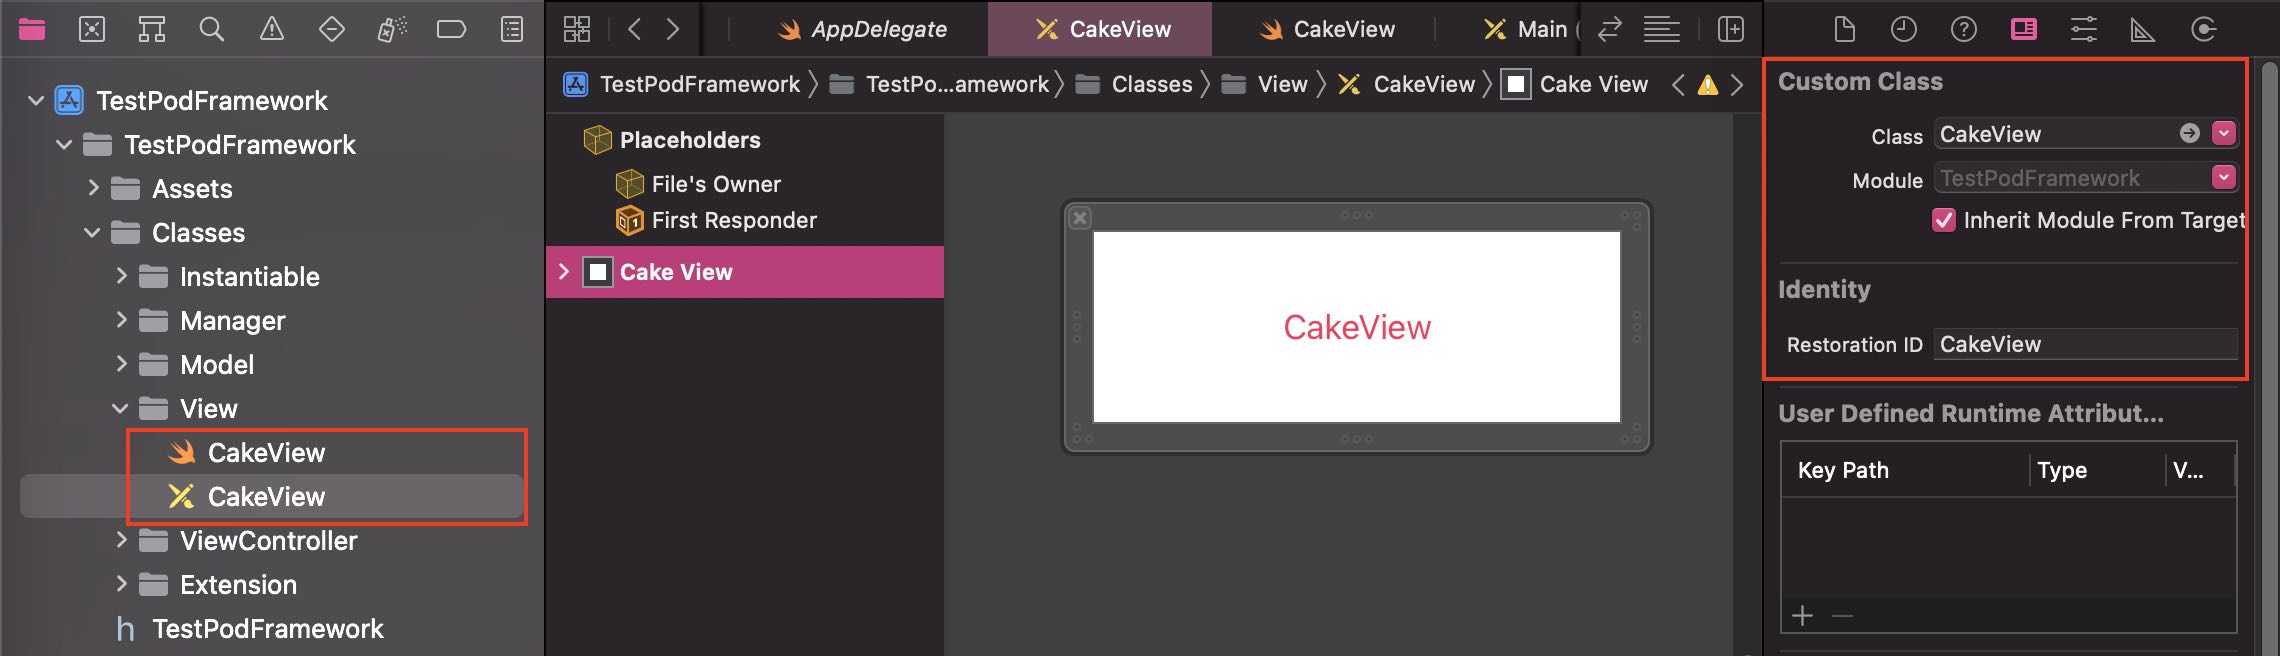
Podspec 內使用 Nib 給外部使用 ( 與 Storyboard 方式類似 )
1
2
3
4
5
6
7
8
9
10
11
12
13
14
15
16
17
18
19
20
21
22
23
24
25
26
27
28
29
30
31
32
|
public protocol NibInstantiable {
static var nibName: String { get }
static var nibBundle: Bundle? { get }
}
public extension NibInstantiable {
static var nibName: String { return String(describing: self) }
static var nibBundle: Bundle? {
if let selfClass = self as? AnyClass{
let bundle = Bundle(for: selfClass)
return bundle
}else{
return nil
}
}
static func instantiateFirstView(owner: Any? = nil) -> Self {
let nib = UINib(nibName: nibName, bundle: nibBundle)
return nib.instantiate(withOwner: owner).first as! Self
}
}
|
上面紀錄之前研究的結果,但模組的 UI 較建議還是使用”純程式碼”的方式撰寫,減少連結、打包或轉移的問題。
Demo 連結
TestPodFramework
TestPodFramework - podspec